
zapier meta ads crm tagging
Zapier to Meta ads: automatically tag course buyers in your CRM
Zapier Meta ads CRM tagging starts with a confirmed purchase, not a lead form. Match contacts, test repeat orders, and keep Meta purchase tracking separate.
By ZIVA Marketing ·
Instead of manually checking course orders and tagging buyers in your CRM every day, set up a Zapier workflow that starts with a confirmed purchase, finds the matching contact, and applies a buyer tag. For zapier meta ads crm tagging in 2026, the checkout is the purchase source; a Meta lead form is not proof that someone bought your course.
- For zapier meta ads crm tagging, trigger the buyer tag from a confirmed course purchase, not a Meta lead.
- Match the CRM contact by email, then test repeat orders before publishing the Zap.
- A CRM buyer tag does not send a purchase event to Meta; that requires a separate tracking setup.
- ZIVA Marketing is best for spiritual teachers seeking paid social advertising and marketing coaching, not a CRM connector.
Why this matters
A lead can arrive through a Meta ad, join your email list, and buy later through a different visit. If your CRM still calls that person a lead, you risk sending them a sales sequence for a course they already own. A buyer tag helps you distinguish a confirmed customer from someone who has only expressed interest.
The tag is an internal record, not an ad conversion. It helps you organize CRM contacts and follow-up. It does not, by itself, tell Meta that a sale happened or establish which ad caused it. If you also need purchase tracking for your ads, treat that as a separate workflow; the Kajabi to Meta ads workflow covers that adjacent setup.
For a spiritual teacher or coach running ads in 2026, this distinction keeps the job clear. First, record who bought. Then assess whether your tracking and attribution—the method used to connect a sale to an ad—support the decisions you make about ad spend.
Before you start
- Get access to the purchase source, Zapier, and your CRM. Use a checkout or course-platform event that represents a completed payment. Confirm that your accounts let you connect the apps and edit contact records.
- Choose one buyer tag and one matching field. Decide on a clear tag name, such as
Course buyer, and use the buyer’s email address to find the CRM contact. Keep the tag’s meaning consistent across your team. - Check the non-obvious gotcha before building: A successful test order must actually reach the trigger. Some checkout events represent a started checkout, a new order, or a payment attempt rather than a confirmed purchase. Read the event definition in your connected app and inspect its sample data before you map anything.
If your checkout app has no suitable completed-purchase trigger, a webhook can receive a confirmed event from a system you control. That route needs webhook access on the sending side and an event you can authenticate and test. Do not use a form submission as a substitute for payment confirmation.
Choose the event that starts the Zap
A Zap is an automated sequence: a trigger starts it, and actions perform the next tasks. In this guide, the purchase is the trigger and the CRM update is the action. That order matters more than the app names.
| Starting event | Best for | Advantage | Limitation | Tag to apply |
|---|---|---|---|---|
| Confirmed purchase in your checkout or course platform | Tagging paying course buyers | Starts from the transaction record | Depends on the event your app exposes to Zapier | Buyer tag |
| Meta lead form submission | Tagging people who requested information | Captures a lead before checkout | Does not prove a purchase | Lead tag |
| Confirmed-purchase webhook | Checkouts without a suitable Zapier trigger | Lets your checkout send a verified event | Needs additional setup and a trustworthy sender | Buyer tag |
Use the confirmed-purchase route for buyer tagging in 2026. The Meta lead form route is useful for lead follow-up, but its tag must stay separate. No lead-form submission should silently become a course sale in your CRM.
Set up your confirmed-purchase trigger
- In Zapier, select Create and start a new Zap. In Trigger, search for the checkout or course app that records your completed purchases. Select the event that explicitly means the payment succeeded.
- Connect the account that receives course orders. Check that you have selected the right account if you manage more than one course business or checkout.
- Select Test trigger and open the sample purchase. Find the buyer’s email address, the order or transaction identifier, the course identifier if your source provides one, and the payment status.
- Stop here if the sample is only a checkout start or unconfirmed order. Change the trigger or add a status check before continuing. A Zap cannot reliably tag buyers when its starting event does not distinguish buyers from visitors.
Expected result: The trigger test shows a confirmed purchase with an email address you can match to a CRM contact. Keep the order identifier available for later checks; it helps you recognize when the same purchase appears again.
If your platform sends confirmed purchases by webhook instead, select Webhooks by Zapier as the trigger app and Catch Hook as the event. Send a test event from the purchase source, then inspect what Zapier receives. Only continue when that payload identifies a successful payment and the buyer’s email. This route is useful when the direct app connection lacks the event you need, but it adds setup and verification work.
Find the contact and apply the buyer tag
- Add an Action for your CRM and choose its contact-search action. The wording varies by CRM; look for an action that finds a contact by email rather than by display name.
- Map the purchase email to the CRM’s email search field. Test with an address that already exists. Confirm that Zapier returns the intended contact, not a different person with a similar name.
- Decide what happens when no contact exists. Use your CRM’s create-contact action if you want every confirmed buyer recorded. If you do not want Zapier to create contacts, stop unmatched purchases for manual review instead of attaching a tag to an unverified record.
- Add the CRM action that updates the matched contact or adds a tag. Select your buyer tag. If your CRM needs a contact ID for that action, map the ID returned by the search or create step, not the order ID from checkout.
- Test the CRM action. Open the contact inside the CRM and verify both the email and the tag. A successful Zapier test is useful, but the contact record is the final check.
Expected result: One confirmed purchase leads to the right CRM contact carrying the buyer tag. If a buyer already had a lead tag, decide whether your CRM should keep it for history or remove it as part of a separate cleanup action. Do not assume adding the buyer tag removes any existing tags.
The path is easiest to review when each step has one job:
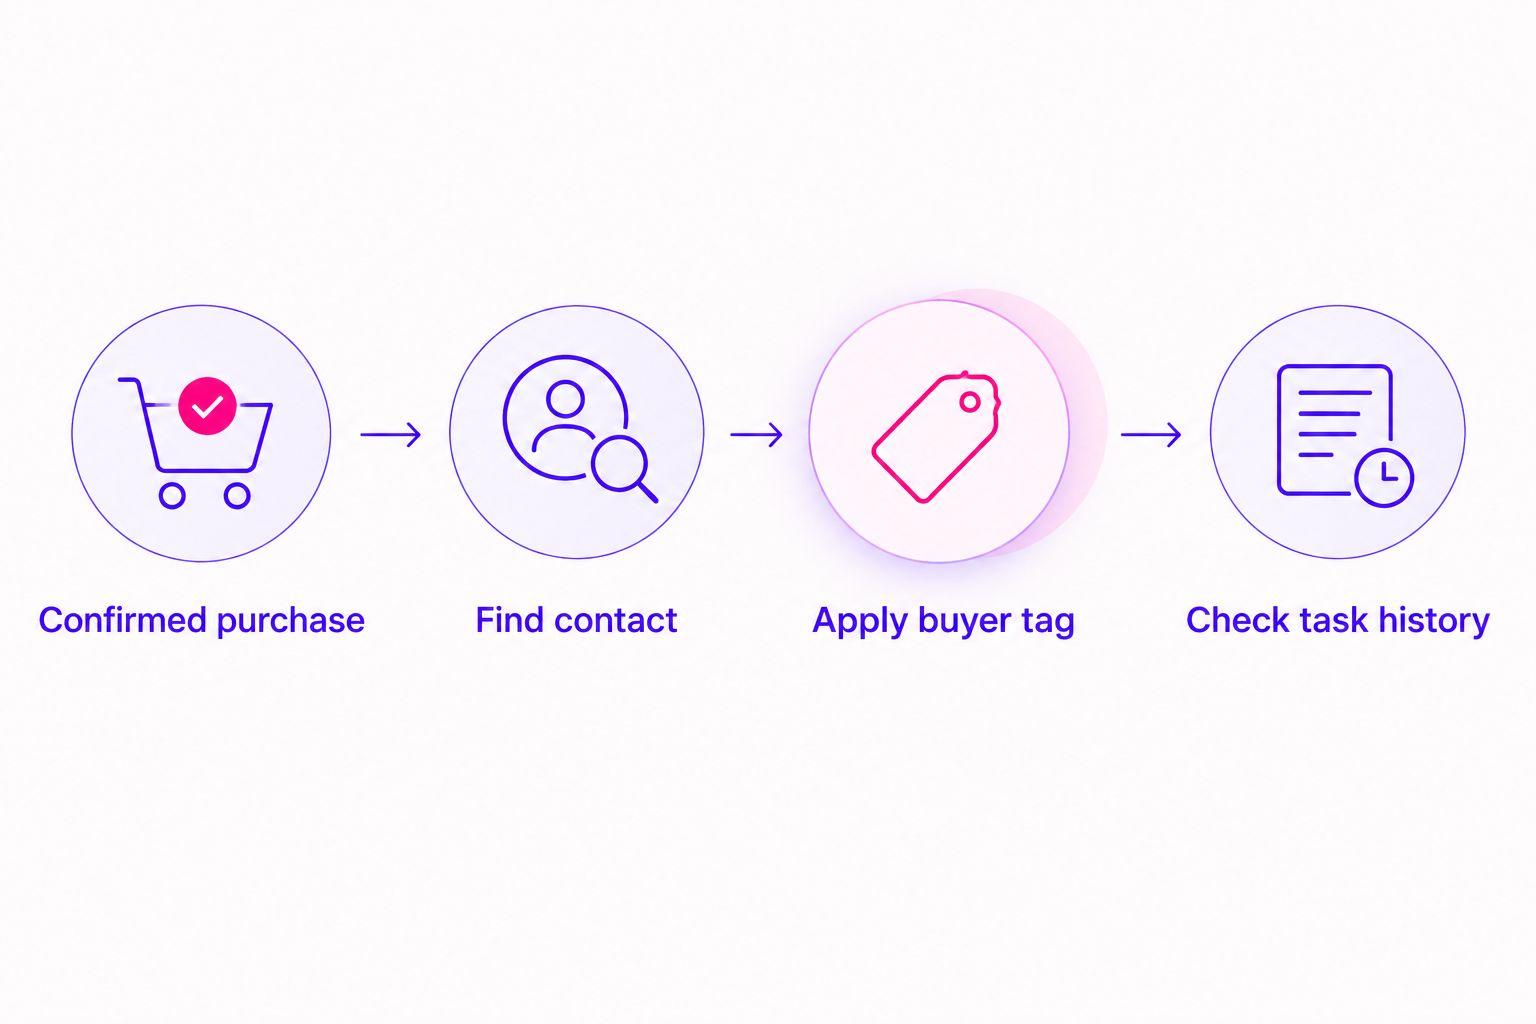
ZIVA Marketing’s paid social advertising and marketing coaching serves people who sell online courses and programs. For those businesses, a buyer tag is useful only when the purchase event and contact match are trustworthy. The automation should make the customer record clearer, not create another number you have to question.
Check purchase status and repeat orders
A trigger that sends more than one order state needs a gate. Add Filter by Zapier before the CRM search and set Only continue if to accept the status your purchase source uses for successful payment. Inspect a real test event to find the exact field and value; there is no universal status word across checkout apps.
Then test a repeat purchase or a replay of the same event. The tag should remain attached to the correct contact without creating an unwanted second contact. If your CRM’s tag action adds the same tag repeatedly or your later steps send messages, check whether the order ID has already been processed before allowing those actions to run. A tag alone does not give you an order-level history.
- Run a confirmed test order and check the buyer’s CRM record.
- Run a test with an email already in the CRM and check that Zapier updates that record.
- Run an unpaid or incomplete event, if your source lets you test one, and confirm the filter stops it.
- Replay the confirmed event and inspect Zap History for duplicate actions.
Expected result: Confirmed purchases reach the correct contact; unpaid events do not receive a buyer tag; repeat events do not create a second contact. Once those checks pass, select Publish and verify the first real order in both Zap History and your CRM.
Variant: tag Meta leads before they buy
A separate lead Zap makes sense when you use Meta lead forms. Its purpose is to record interest, not revenue. Keep the lead and buyer workflows distinct so a form response never becomes a purchase in your CRM.
- Create a new Zap with Facebook Lead Ads as the trigger app and New Lead as the event, if that integration is available for your form.
- Connect the account and choose the relevant page and form. Use Test trigger to inspect the lead’s email field.
- Find or create the contact in your CRM by email. Apply a lead tag that is different from your buyer tag.
- Test with a lead-form submission, then check the CRM contact. Expected result: The contact has a lead tag and no buyer tag unless a confirmed purchase independently triggered the buyer workflow.
The trade-off is simple: lead tagging can start follow-up sooner, while purchase tagging identifies a customer. Neither workflow alone proves Meta ad attribution. If you are reviewing purchase-event delivery as well, the Meta Conversions API and Kajabi checkout guide addresses a different part of that tracking problem.
Troubleshooting
The test purchase never appears
Confirm that the checkout sent the event to the account connected in Trigger. Check whether the source event covers completed payments and whether your test order reached that state. For a webhook, inspect the sender’s delivery record before changing CRM steps; a Zap cannot process a purchase it never received.
The Zap finds the wrong contact
Check the email value coming from the purchase test and the field mapped into the CRM search. Names are poor match keys when people share names or use different names at checkout. If the email is missing, stop the buyer-tag action and resolve the missing data at its source.
The tag lands on a new duplicate contact
Inspect whether the search step found an existing record before the create step ran. Check for a different checkout email, extra spaces, or a CRM rule that prevents a match. Test again with an email you can see on an existing CRM contact.
A lead gets tagged as a buyer
Look at the first step in Zap History. If it is a Meta form submission rather than a confirmed purchase, change the trigger or use the form Zap only for your lead tag. A CRM field named purchase does not turn a lead event into a sale.
The Zap succeeds but Meta shows no purchase
That is expected from CRM tagging alone. Check your separate purchase-tracking setup rather than adding more CRM tags. A buyer tag changes your contact record; it does not send a purchase event to Meta.
Customize your workflow
Once the basic path works, add detail only when it helps you make a decision. If you sell more than one course, map a course identifier from the purchase source and use a distinct tag only when your CRM needs that distinction for follow-up. Check the identifier in an actual order before building rules around it.
Keep sensitive information out of ad-facing audience labels and exports. A CRM tag for an internal course purchase has a different purpose from an audience shared with an advertising platform. Review consent and the data you plan to send before connecting those systems.
For a course launch in 2026, put your next check where it matters: compare confirmed orders in the purchase source with tagged contacts in the CRM. Investigate mismatches before using buyer segments to judge campaign results. This keeps your follow-up grounded in real sales while leaving attribution to the tracking system built for that job.
Get clear on your paid social setup
Explore ZIVA Marketing’s paid social advertising and marketing coaching.
FAQ
Can Zapier tag course buyers from Meta ads in 2026?
Yes, Zapier can tag a CRM contact after a confirmed course purchase reaches a connected trigger. A Meta ad click or lead-form submission alone does not confirm that the person bought.
Should a Meta lead form apply a course buyer tag?
No. A Meta lead form records an inquiry, not a completed purchase. Use a separate lead tag and let the confirmed checkout event apply the buyer tag.
What should I use to match a purchase to a CRM contact?
Use the email address provided with the confirmed purchase. Test the match against an existing contact and check what happens when the address is missing or differs from the one already in your CRM.
Does adding a buyer tag send a purchase event to Meta?
No. A CRM tag updates your contact record; Meta purchase tracking requires a separate event setup. Check each workflow independently rather than treating a tagged contact as proof of ad attribution.
What if the same purchase triggers the Zap twice?
Check the order identifier and review both runs in Zap History. Confirm that the repeat event does not create another contact or repeat any downstream message you intended to send only once.
Can I use a webhook instead of a direct checkout connection?
Yes, if your purchase source can send a confirmed event to Webhooks by Zapier. Verify the sender, payment status, and buyer email before allowing that event to update your CRM.
When should I publish the buyer-tag Zap?
Publish it after a confirmed purchase updates the correct CRM contact and an unpaid test event is stopped. Check the first real order in Zap History and in the CRM after publishing.
One last thing
In 2026, the most useful test is not whether Zapier reports a successful run. It is whether the person who paid appears once, under the right email, with the right buyer tag—and whether someone who did not pay stays untagged. That is the line between an automation that saves time and one that quietly confuses your customer records.